Recently, OpenClaw has been very popular, and many friends want to experience this powerful AI assistant tool as soon as possible. My cousin helped everyone to test it out; I conducted in-depth installation tests on both Windows and MacBook.
After a series of operations, the most direct feeling is: the installation experience on the Windows platform is obviously more user-friendly. In contrast, the system permission restrictions on the MacBook are very numerous, making the debugging process extremely torturous for technical novices; a small mistake can lead to permission error issues. Therefore, if you want to use OpenClaw in the quickest and most hassle-free way, Windows/Linux is the first choice.
⚠️ Security Tip: Before starting, there is a very important reminder: Since such tools involve automated operations and environment configuration, if your computer contains important commercial/assets or personal privacy information, it is strongly recommended to use a clean backup device or directly rent a cloud virtual machine (VPS) to run. This can protect your privacy and avoid environmental conflicts.
Without further ado, the tutorial officially starts! I will write down the problems and solutions I encountered in the content, it may be a bit lengthy, if there are no errors during the installation process, just skip it!!
———————————————————
Part One: Three Steps of Environment Deployment (Lay the Foundation)
The steps written by my cousin are all based on the strict requirements for OpenClaw to run smoothly. If the environment does not meet the standards, subsequent installations are likely to encounter errors.
1/ Rent a virtual machine (links cannot be posted in the square, search for tutorials yourself)
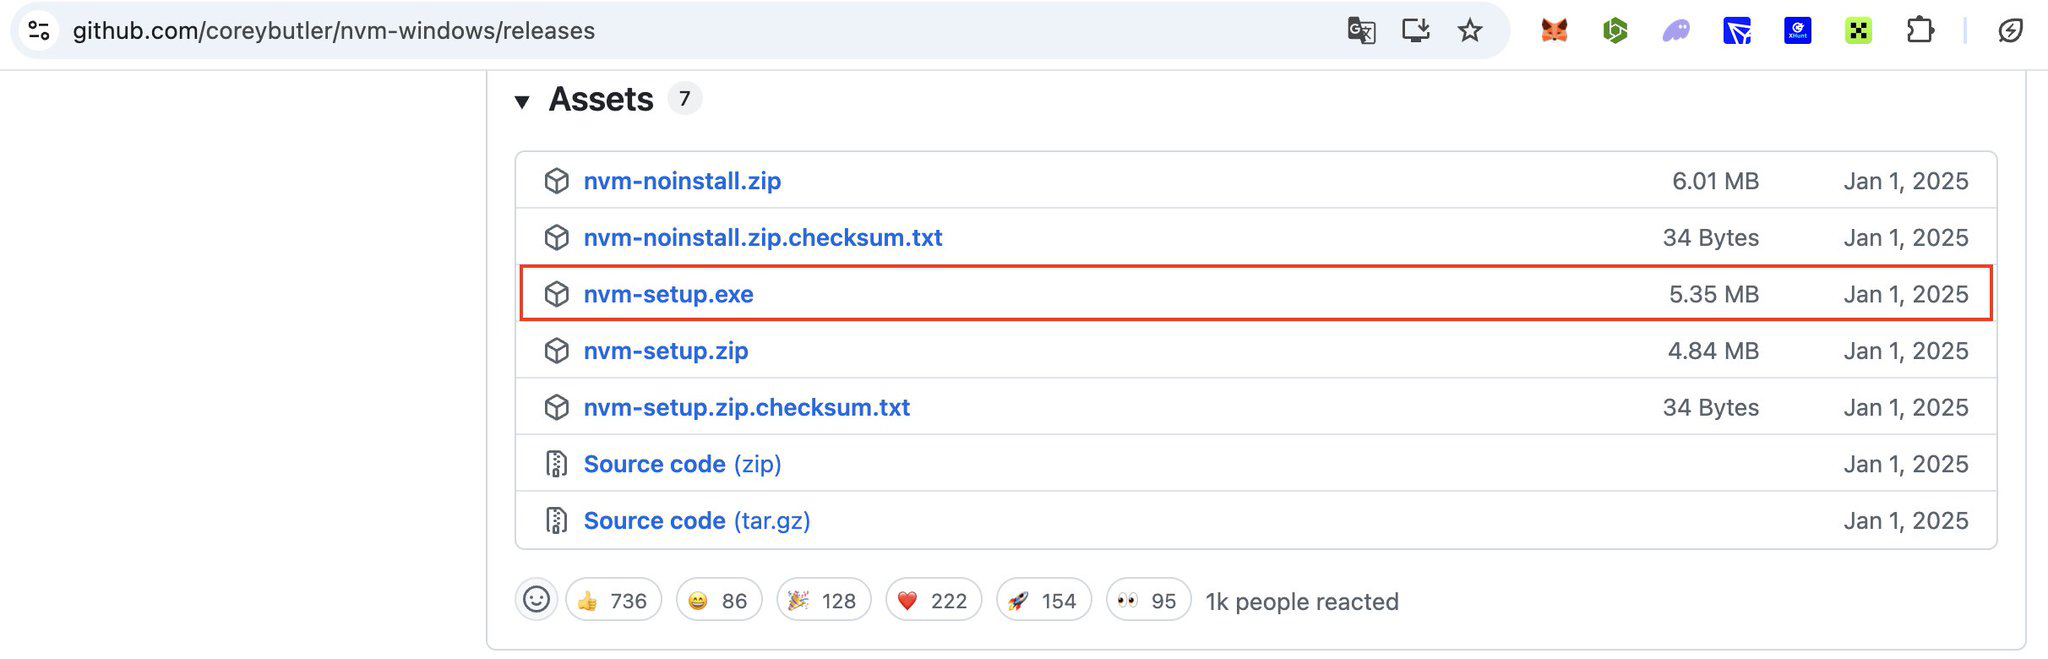
2/ Install the official version of nvm
• Go to github to download nvm-setup.exe, and then reopen PowerShell in administrator mode (right-click admin...)
3/ After installation, you can directly use nvm to download and use node.js version 22.22.0
PowerShell installation & enable command (performed in two parts):
nvm install 22
nvm use 22.22.0

⬆️⬆️ If this is displayed, it means success
Part Two: Start Installing OPENCLAW
Window Powershell installation command:
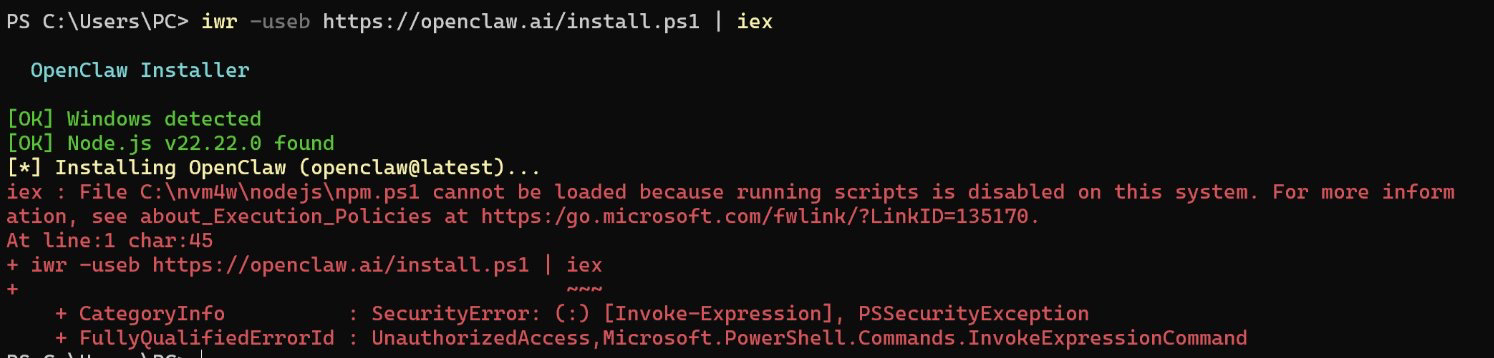
iwr -useb https://openclaw.ai/install.ps1 | iex
⚠️ If the following error occurs, it means you do not have administrator privileges
Solution: Open an administrator PowerShell and run
Set-ExecutionPolicy -ExecutionPolicy RemoteSigned -Scope CurrentUser
After finishing, paste the installation code again, it should be ok. But here, my cousin encountered a new problem, meaning that my computer doesn't know where it was installed. If you didn't encounter any issues, you can skip to the next section.
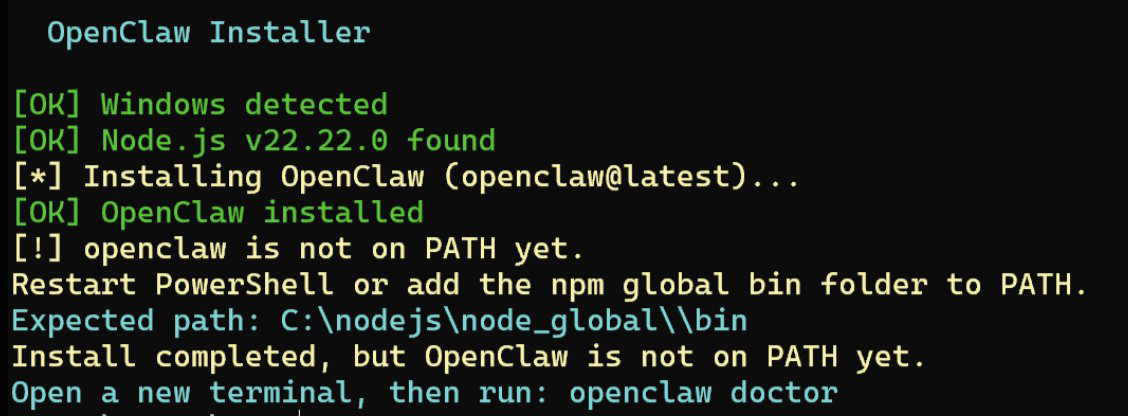
Solution: Close and reopen powershell
If you're lucky, nvm will automatically handle the path, if not, you'll have to add it manually.
Manual addition method:
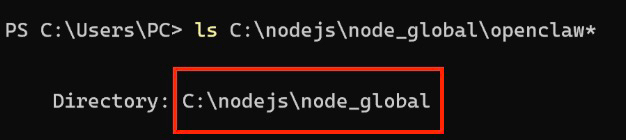
1/ Run the following command to confirm the location of openclaw
ls C:\nodejs\node_global\openclaw*
Then press Window + S to search and open Environment Variables, click New to manually add, and make sure to click OK at the bottom to complete the addition successfully.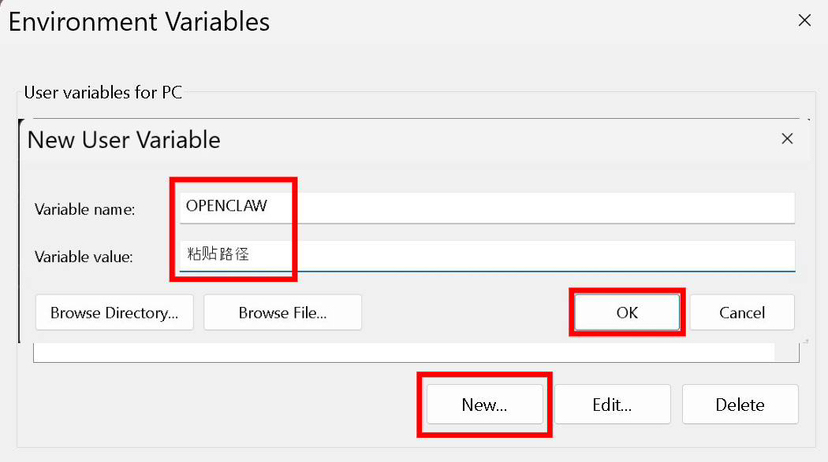
—————————————————
Then close and reopen PowerShell Admin version again
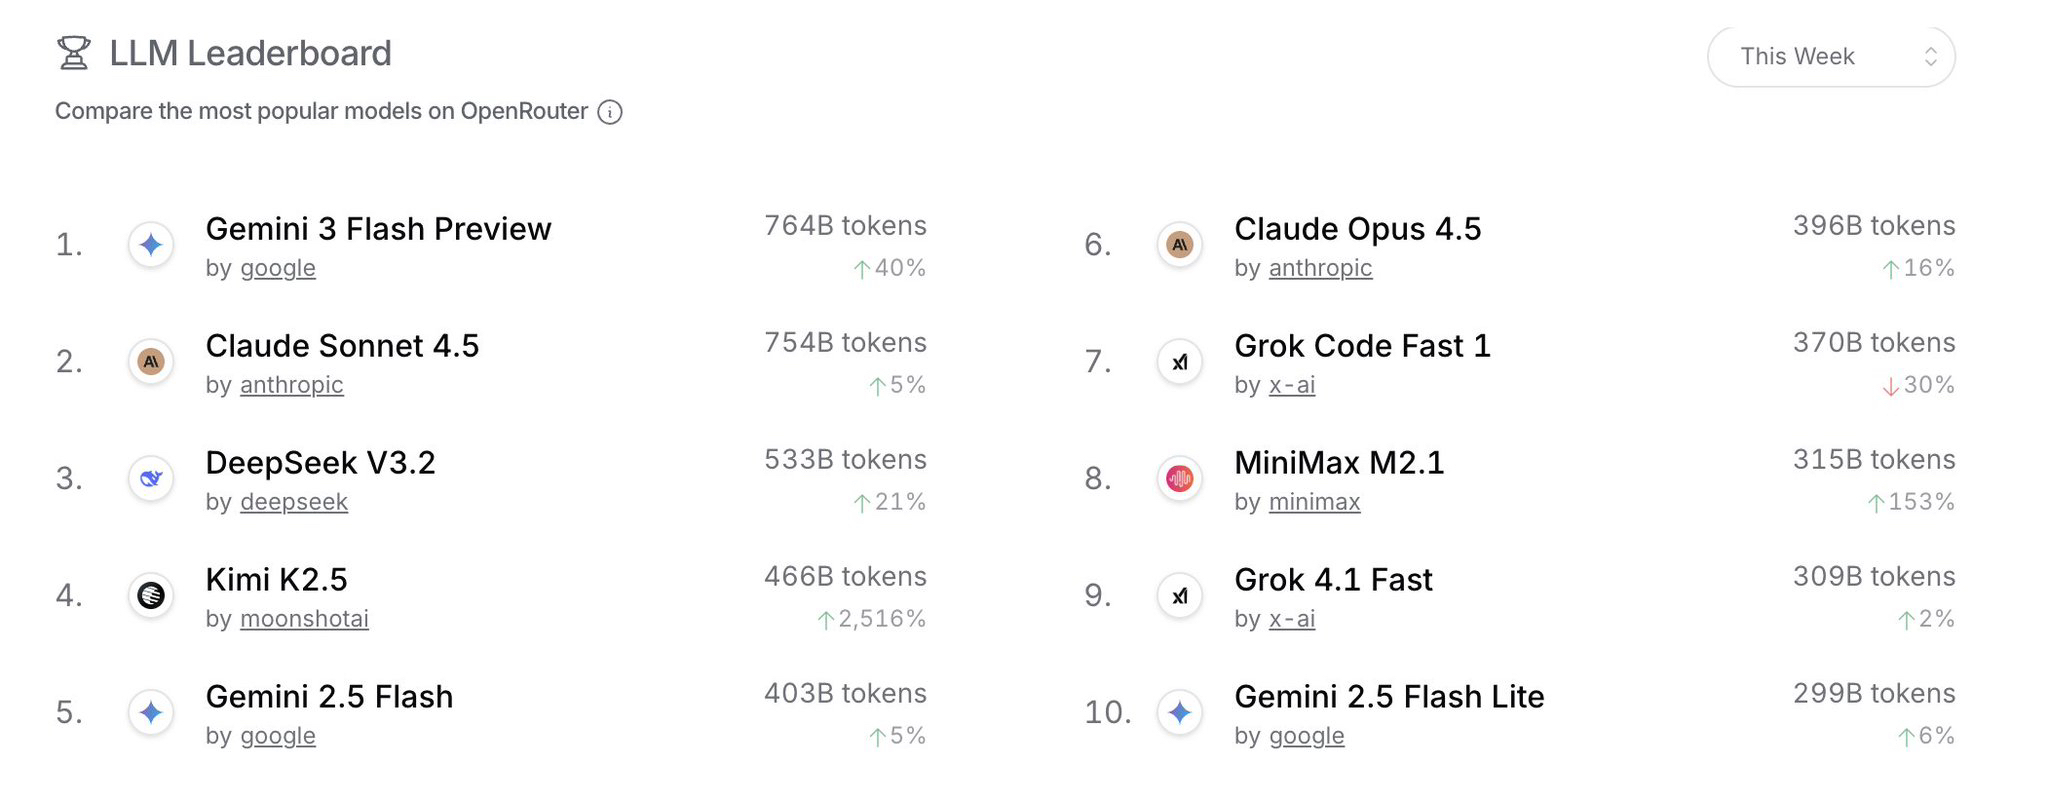
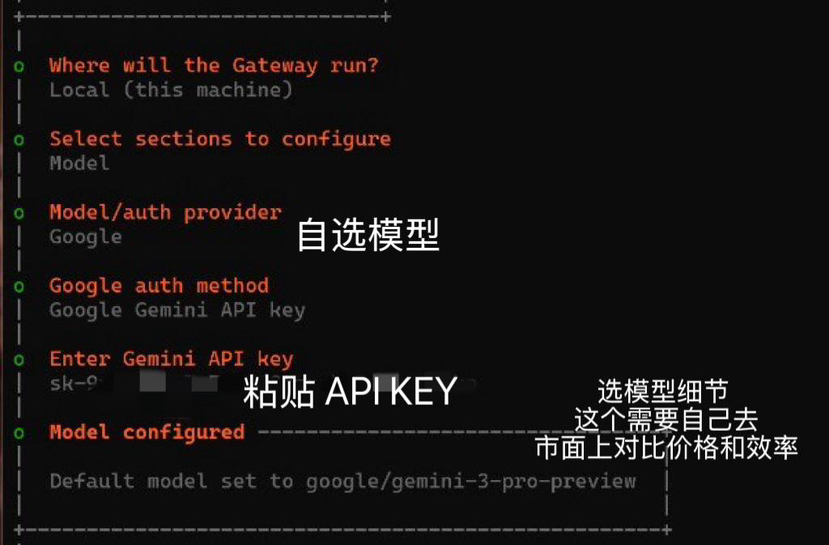
Before starting the setup, decide in advance which API you want to use (it will be needed shortly), choose the AI model according to your preference:
Next, we officially start setting up OPENCLAW
Enter in PowerShell:
clawdbot onboard --flow quickstart
The first problem
I understand this is powerful and inherently risky. Continue? Select Yes
Then follow the steps to select the model
Finally, use the space bar to select the functions you need. These functions can be instructed to be installed by the bot in the conversation if not installed.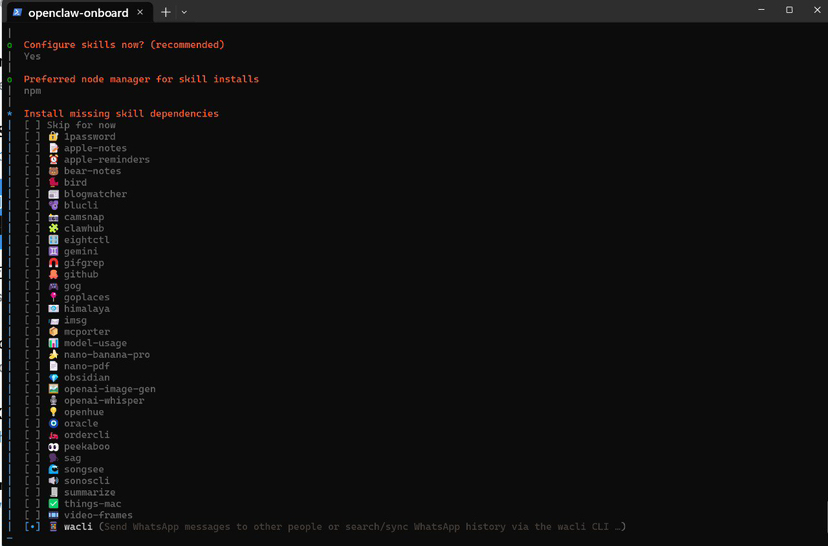
Then proceed to connect social software
I have looked at a lot of things about security and feel that currently connecting to WhatsApp and WeChat is not a very secure choice, so I personally recommend connecting to a telegram bot instead, which is actually better.
The steps are also very simple: go to find botfather to create a new bot, then go to getidsbot to get your telegram numeric account id
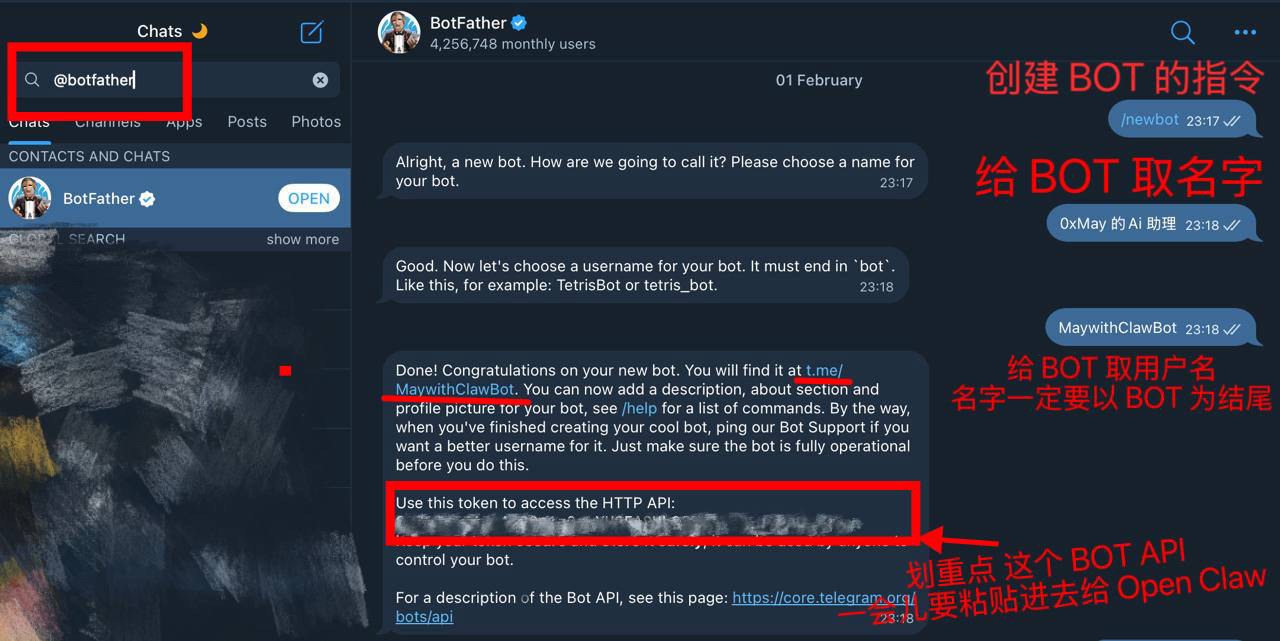

After getting both items, we continue setting up
Enter Telegram Bot Token ➡️ Paste the API obtained from Botfather and press Enter
Then enter owner id/username, fill in the numeric id obtained from getidsbot directly here
Basically, it's done, you can directly issue the command /start to the robot
But I encountered yet another problem 😅 The robot is unresponsive
Go back to powershell and enter the command openclaw doctor
I checked again and it shows that the Gateway is not installed
I don't know which step went wrong, but it's okay, everything can be remedied!
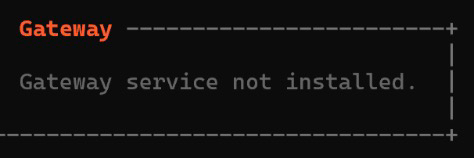
Solution:
Open PowerShell with administrator rights and run:
openclaw gateway install
Finally, run the startup command:
openclaw gateway start
Then you can go talk to the robot with /start
—————————————
Other commands
Refresh/restart robot command:
openclaw gateway restart
Reset/change API and other configuration details command:
openclaw config
Robot diagnosis:
openclaw doctor
Robot Real-time Listener:
openclaw logs follow
(The robot will display the reason for the bug in powershell)
🏁 The purpose of the hassle is to free up your hands
The process of deploying OpenClaw, though filled with red error messages, makes all the operations worthwhile when you see the Bot respond! For ordinary people, this is not just an assistant but also a significant step in exploring automated workflows.
If you also encounter unresolvable bugs during the configuration process, feel free to leave a message in the comment section!
Let's see if we can learn from each other and troubleshoot together!
If this nanny-level tutorial really helped you, don't forget to like and save it!! Love you ♥️