If you're into price action, SMC (Smart Money Concepts), or ICT (Inner Circle Trader) strategies—this one's gold! The image you shared breaks down the Bullish Retest Entry perfectly: a high-probability setup where price breaks key levels, pulls back to "retest" them as new support, then rockets higher. Low-risk entries, strong risk-reward—exactly what pros hunt for. Let's decode it step by step with real alpha!
Core Idea: "Break → Retest → Rally"
Price doesn't just break resistance and keep going forever. Smart money often engineers a pullback to:
- Shake out weak hands
- Grab liquidity (stops)
- Confirm the flip (old resistance → new support)
Then boom—strong continuation rally!
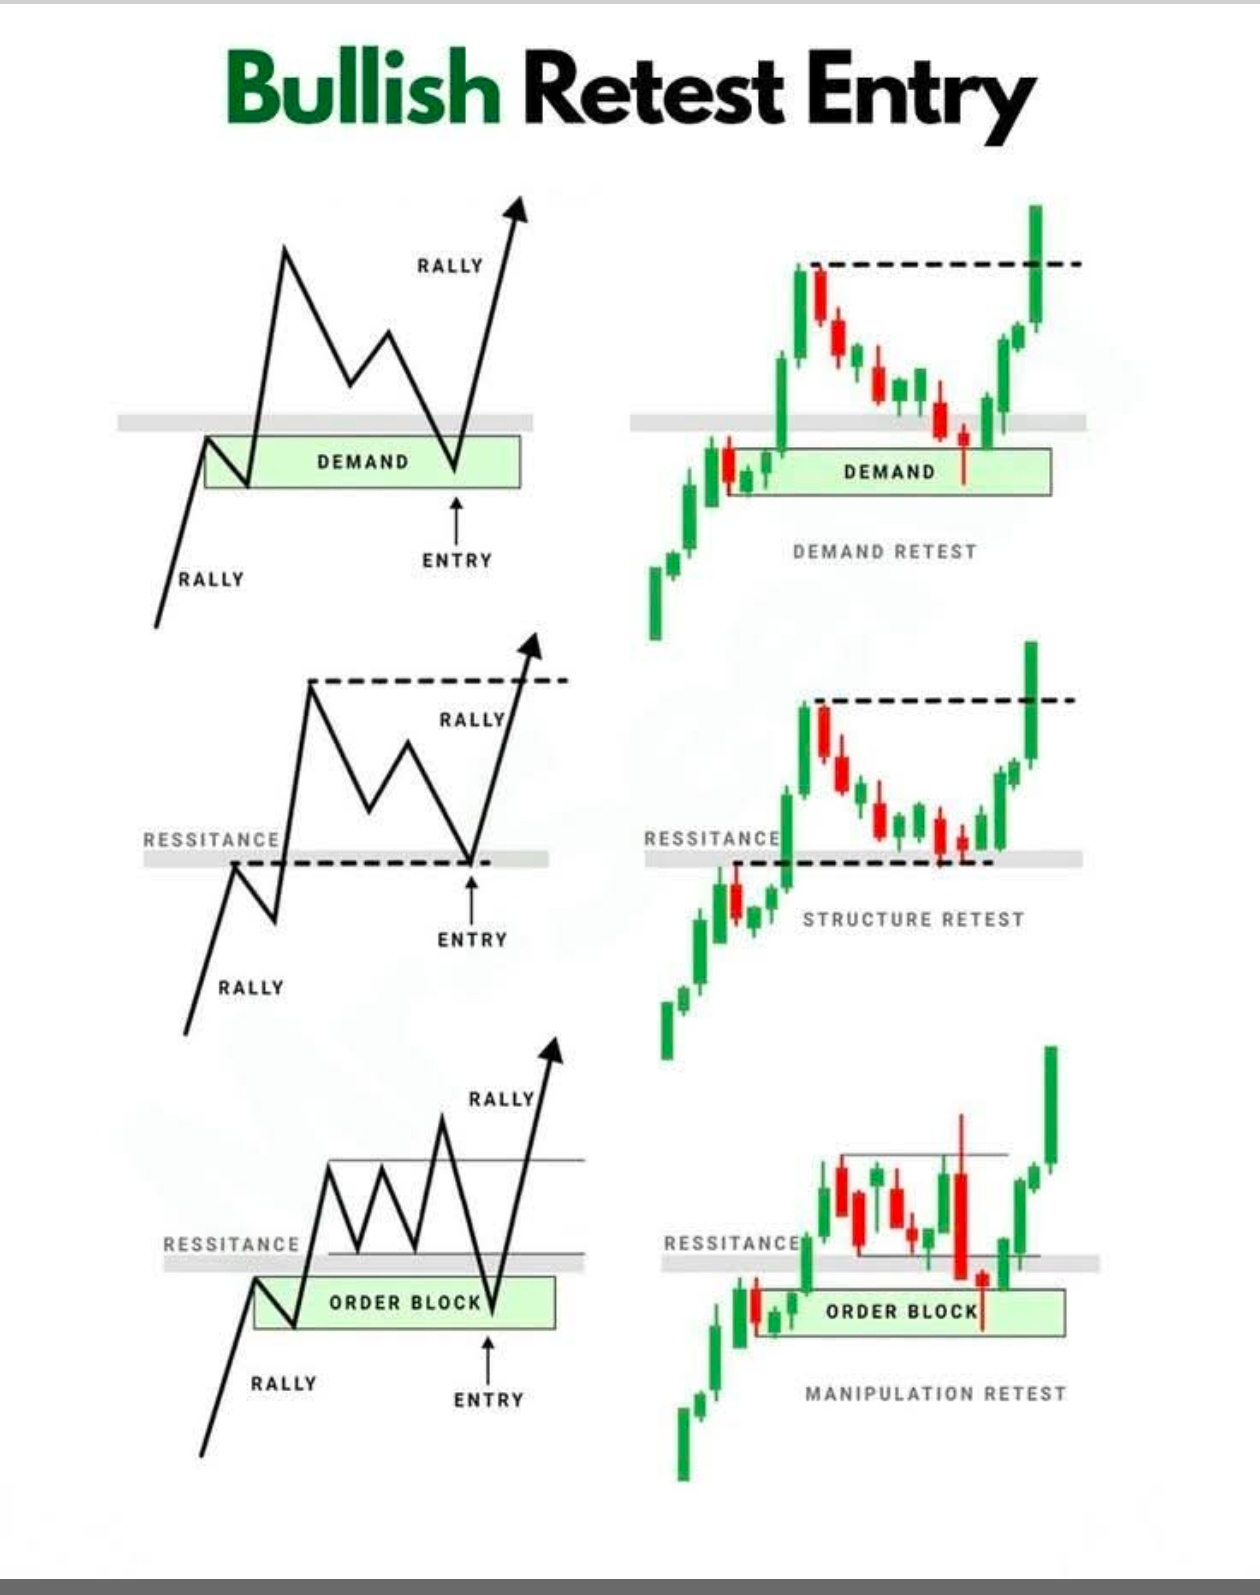
3 Classic Bullish Retest Setups (from your chart):
1. Demand Zone Retest 🟢
- Price rallies from a strong demand zone (support area with buying pressure).
- Breaks higher → pulls back to retest the same demand as new support.
- Entry: On the bounce (green arrow up).
- Why it works: Institutions defend their accumulation zone—perfect for DCA or spot buys in crypto like BTC/ETH dips.
2. Structure/Resistance Retest 📊
- Price rallies, breaks a clear resistance line (dashed black).
- Quick dip back to retest it (now support).
- Entry: At the retest with confirmation (e.g., bullish candle rejection).
- Pro tip: Look for structure break + retest for cleaner entries—avoids fakeouts!
3. Order Block + Manipulation Retest ⚡
- Price rallies from an Order Block (last bearish candle before big move up—green box).
- Breaks out → pulls back to retest the OB (often with "manipulation" wick to hunt stops).
- Entry: On the bounce from the OB retest.
- SMC/ICT favorite: This is where smart money accumulates quietly—watch for high-volume rejection candles!
How to Trade It Like a Lion (Quick Checklist):
- Wait for clean breakout (no wick fakes).
- Patience for the retest (don't FOMO the break).
- Confirm with price action (bullish engulfing, pin bar, volume spike).
- Entry: Above retest high (aggressive) or limit order at zone.
- Stop-loss: Below the retest low/demand/OB.
- Targets: Next resistance or 1:3+ RR.
This setup crushes in volatile markets like now (BTC/ETH dips turning into pumps). Seen it work on ETH this week—retest demand → quick 5% bounce!
Lions, which one is your go-to?
- Demand retest for safe plays?
- Order block manipulation for high-reward?
- Or waiting for structure flips? Drop your favorite example or coin below! 👇 Tag a trader who needs this lesson 😂
Market red means green for buyers. 🟢 Catch the reversal before it lifts off. Invest Now, Big Opportunity. 📈 DYOR
NEED LATEST MARKET UPDATES on BINANCE SQUARE ✅ FOLLOW Lions_Lionish NOW 🔥💰💵
#LionsAlpha #BullishRetest #SMC #ICT #OrderBlock #DemandZone #TradingTips #BinanceSquare #CryptoBD #TechnicalAnalysis

